Table of Contents
Background
Syncthing is a fantastic tool for keeping folders continuously synced between different devices. It’s open source, secure, private, and does not require DNS or other network configuration. I use it to sync files between my phone and laptop.
But I don’t like that I have to set up Syncthing manually each time I set up a new computer. Also, it would be nice to back up files even when one device is offline.
For this guide, we will first set up a declarative Syncthing configuration on NixOS, and then set up a VPS version on Hetzner cloud. Both deployments will automatically connect to each other and are fully reproducible.
(Side note: This post will eventually go out of date. I have added almost everything here to the Syncthing page on the official NixOS wiki , which you should check because it will be continuously updated. Also, you should check the documented options for Syncthing.)
Goals
- Set up new reproducible Syncthing deployments
- Generate and back up Syncthing secret keys
- Install NixOS using nixos-anywhere
- Deploy secrets using sops-nix
Prerequisites
- First, we install and configure Syncthing on a workstation. For this part, you just need to be running NixOS and know how to:
- edit your configuration (usually
sudo -e /etc/nixos/configuration.nix) - rebuild your system (e.g.
sudo nixos-rebuild-switch)
- edit your configuration (usually
- In part two, we set up secrets management with sops-nix , install NixOS on a Hetzner Cloud VPS, and deploy Syncthing to the VPS. For this guide, I am using a flake configuration. You should already have set up a flake for your system so you can add the VPS entrypoint and sops-nix dependency. This starter config is a good way to get started.
- The Hetzner Cloud server costs €4.51/month.
Reproducing Syncthing
Before we set up a declarative Syncthing configuration, let’s briefly take a look at the files that Syncthing creates.
Add the following code to your configuration (change ‘wrycode’ to your user) and run nixos-rebuild switch
services = {
    syncthing = {
        enable = true;
        user = "wrycode";
        dataDir = "/home/wrycode";    # Default folder for new synced folders, instead of /var/lib/syncthing
        configDir = "/home/wrycode/.config/syncthing";   # Folder for Syncthing's settings and keys. Will be overwritten by Nix!
    };
};
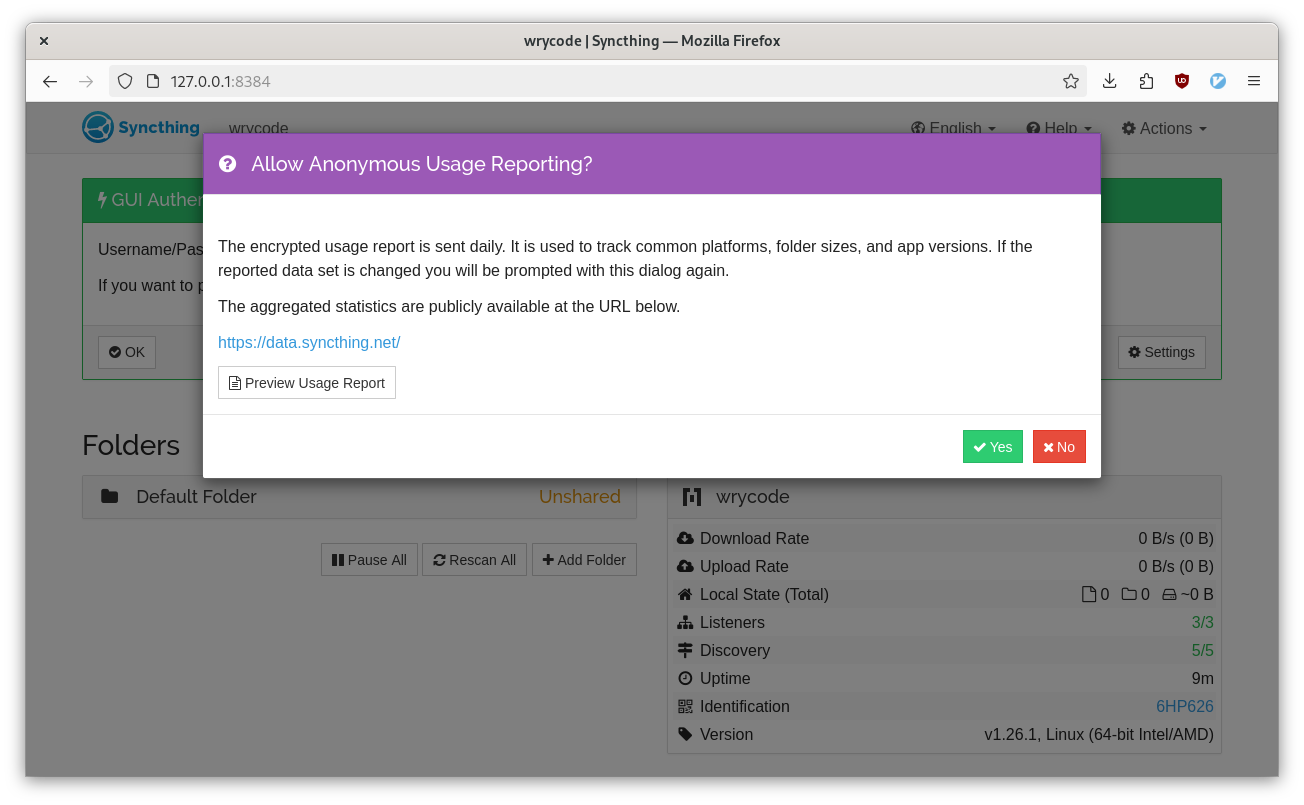
Now load up 127.0.0.1:8384
in your browser. You should see Syncthing running and some dialog boxes you can dismiss for now:
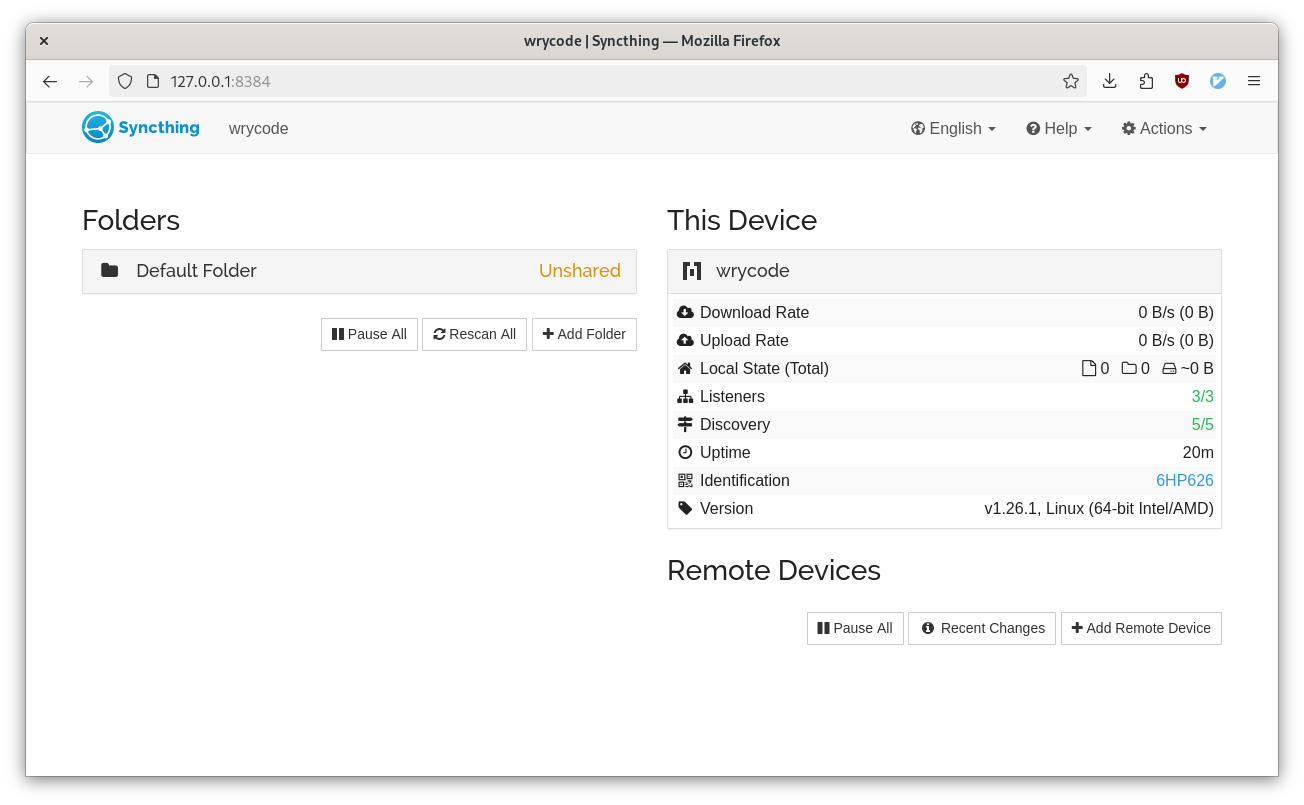
 After dismissing the popups:
 If you look at ‘Default Folder’, you will see that Syncthing created a ‘Sync’ folder in your home directory. So annoying! Even more annoying, later, when we switch to a declarative configuration, Syncthing will create this folder every time it initializes a new configuration (even when the declarative configuration does not include the ‘Sync’ folder). Luckily, we can disable that with the following option:
systemd.services.syncthing.environment.STNODEFAULTFOLDER = "true"; # Don't create default ~/Sync folder
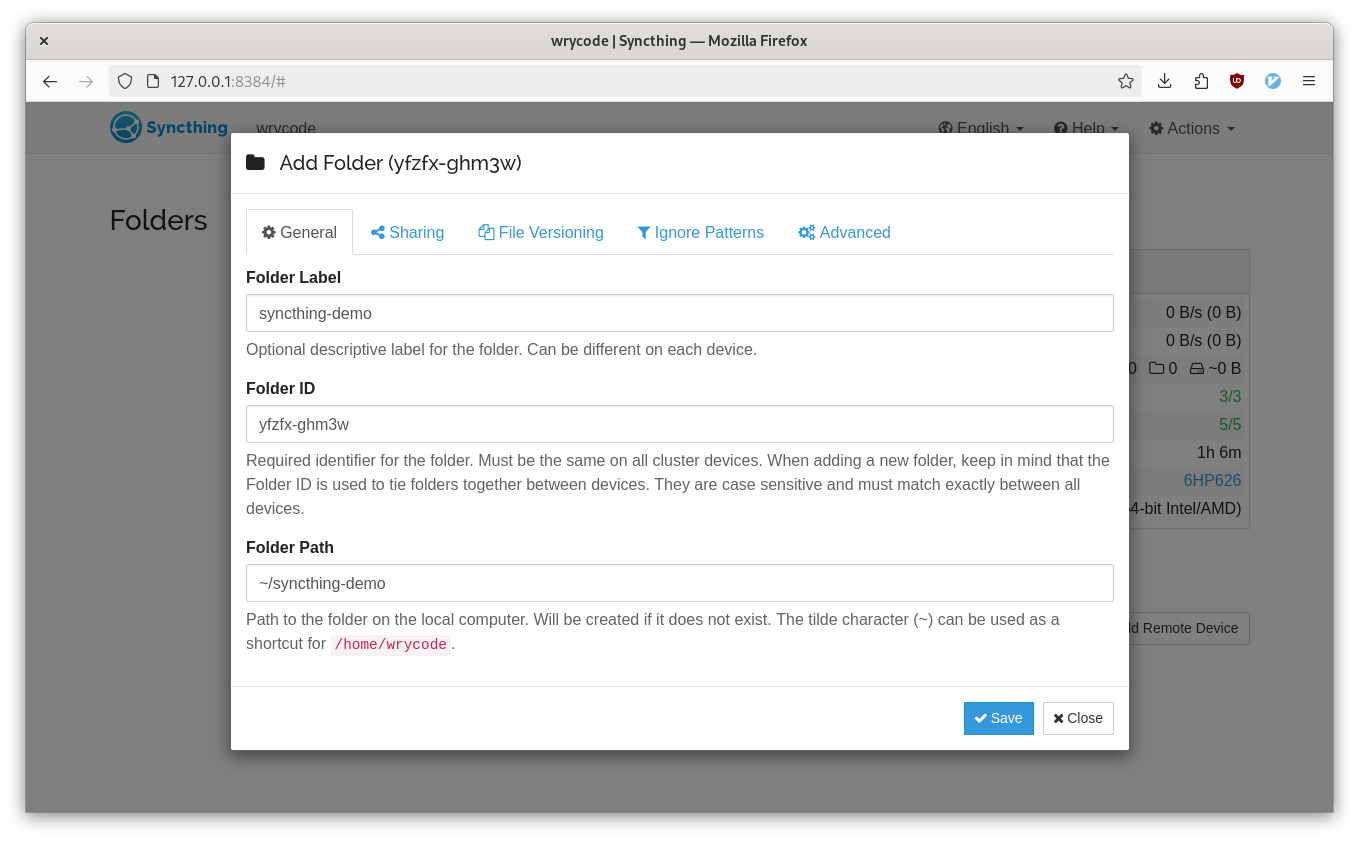
Let’s create a folder we actually want to sync. I used ~/syncthing-demo. After you create your folder, add it to Syncthing:
 Now we can look at the configuration files Syncthing generated. By default, Syncthing will store private keys, device and folder configuration, and the sync database in
 configDir, which we set to ~/.config/syncthing. Take a look through the files:
 The files we care about are
 config.xml, key.pem, and cert.pem. If we can reproduce these files, Syncthing will automatically behave as expected, using the same node ID, connecting to the same devices, and syncing the same folders.
Luckily, the contents of config.xml can be configured using the options
provided by the Nixpkgs syncthing package. Let’s take a moment to thank the Nixpkgs contributors who made this easy for us!
But key.pem and cert.pem are secrets that we shouldn’t just paste into our configuration, especially if we’re going to have it backed up somewhere like Github.
Testing reproducibility
The only way to test reproducibility is by deleting the generated configuration. Let’s do that:
systemctl stop syncthing
yes | rm -r ~/.config/syncthing
Now run nixos-rebuild switch and inspect the same files. Obviously, the configuration wasn’t reproducible. Syncthing doesn’t know about the ~/syncthing-demo/ folder, and it will have a different key.pem and cert.pem.
Ok, so we need to back up key.pem and cert.pem somewhere. You can copy them out of this current configuration, but this is kind of inefficient if you want to deploy multiple nodes. Every time you want to deploy a new node, you’d need to ‘false start’ with a dummy configuration to generate Syncthing keys before writing a declarative configuration.
Instead, as a shortcut, Syncthing has a command to generate configurations. Let’s create some keys we can use in a new directory called ~/.keys:
mkdir ~/.keys
cd ~/.keys && nix-shell -p syncthing --run "syncthing -generate=workstation"
output
$ cd ~/.keys && nix-shell -p syncthing --run "syncthing -generate=workstation"
2024/04/22 11:47:39 INFO: Generating ECDSA key and certificate for syncthing...
2024/04/22 11:47:39 INFO: Device ID: YWF5JDX-XDVDREO-N6KCQ3N-EZVQY3M-ABNQNOC-HXDL4PH-QGLX2QO-JQY4WQV
2024/04/22 11:47:39 INFO: Default folder created and/or linked to new config
.keys $ ls
workstation
.keys $ ls workstation/
cert.pem  config.xml  key.pem
.keys $
~/.keys/workstation/cert.pem and ~/.keys/workstation/key.pem in our declarative configuration. Later on, you can delete ~/.keys in favor of actual secrets management, but for now, this is where our Syncthing secrets will live.
Time to build out a declarative configuration:
  services = {
    syncthing = {
      enable = true;
      user = "wrycode";
      configDir = "/home/wrycode/.config/syncthing";   # Folder for Syncthing's settings and keys. Will be overwritten by Nix!
      key = "/home/wrycode/.keys/workstation/key.pem";
      cert = "/home/wrycode/.keys/workstation/cert.pem";
      settings = {
        devices = {
          # Existing devices here!
          # pixel.name = "pixel";
          # pixel.id = "YOUR-LONG-DEVICE-ID-GOES-HERE";
        };
        folders = {
          syncthing-demo = {
            path = "/home/wrycode/syncthing-demo";
            versioning = {
              type = "simple";
              params = {
                keep = "10";
                cleanoutDays = "0";
              };
            };
            # devices = ["pixel"];
          };
        };
      };
    };
  };
This is a minimal example with our ~/syncthing-demo/ folder. To fully configure Syncthing, make sure to browse the available options
. I also recommend reading about file versioning
.
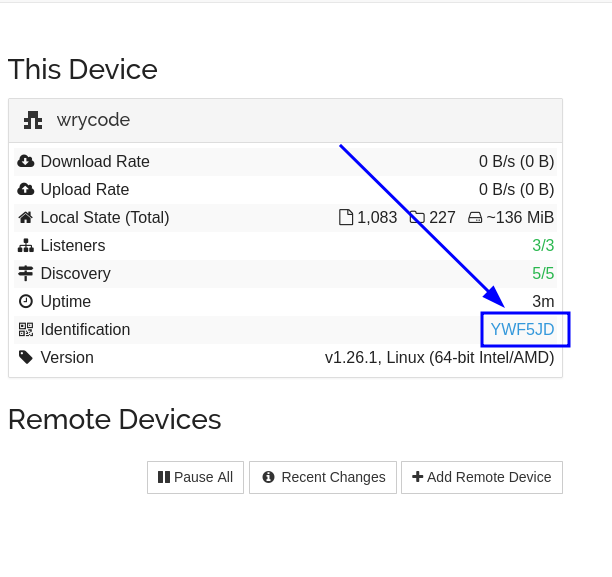
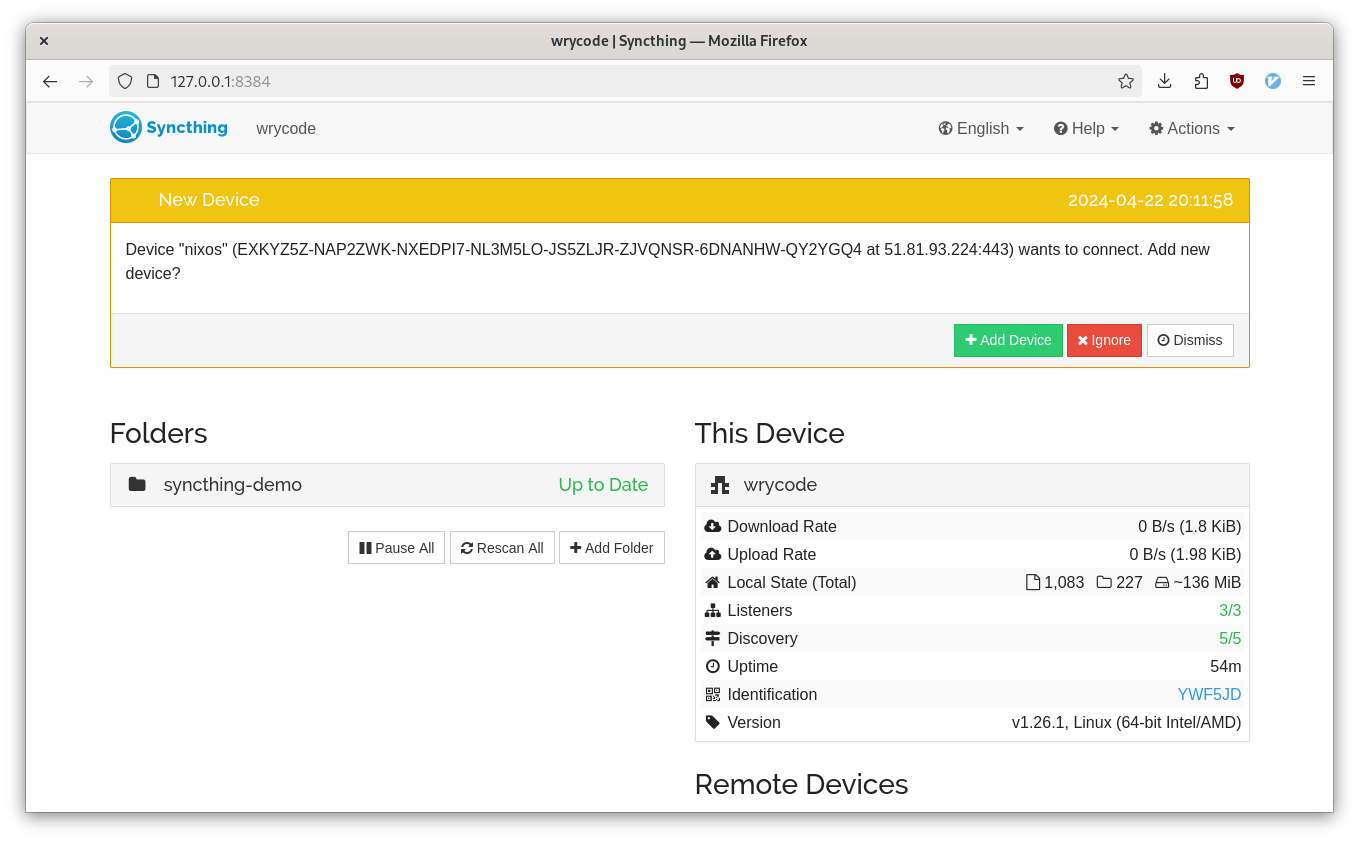
Now it’s time to test reproducibility. Take note of your node’s ID in the web GUI at 127.0.0.1:8384
Optional: If you have an existing device using Syncthing, this is a great opportunity to watch the reproducibility in action. For instance, you can see how I configured my phone (a Google Pixel) in the commented-out lines. I got a popup on the Syncthing app on my Pixel and added the demo Syncthing node:
![]()
To test reproducibility, we delete the configuration like before:
systemctl stop syncthing
yes | rm -r ~/.config/syncthing
Now run nixos-rebuild switch. Syncthing should rebuild the configuration directory at ~/.config/syncthing, and the UI should show the same folder and node ID.
If you connected another device, Syncthing should reconnect and start syncing like nothing happened.
Now we have a reproducible Syncthing configuration on our workstation. All you need to do is back up your configuration.nix and the keys we stored in ~/.keys.
Part two: deploying to a Hetzner VPS
Now we are going to deploy a second instance on a Hetzner Cloud server. We are throwing a few new tools into the mix:
- age , the cryptography backend we’ll use for sops-nix
- nixos-anywhere , to install Nixos on the server
I am going to include screenshots for Hetzner Cloud, but the installation should work for any host you choose.
When we create a server in Hetzner, we need to add an SSH key to administer the server. use ssh-keygen to generate a keypair if you don’t have one already.
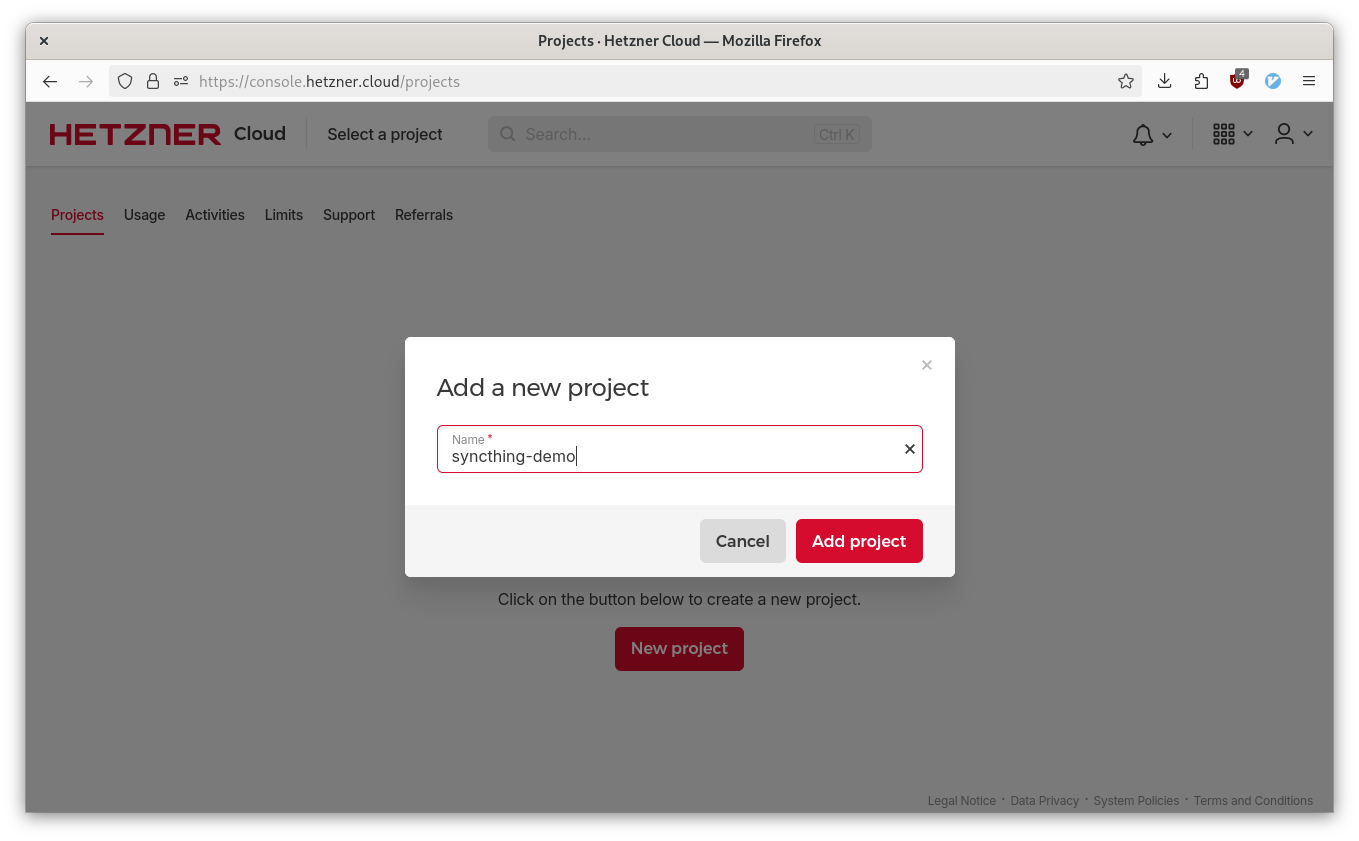
Now create an account on Hetzner and log in
, then create a new project. I’m calling mine syncthing-demo:
 Click “CREATE SERVER”:
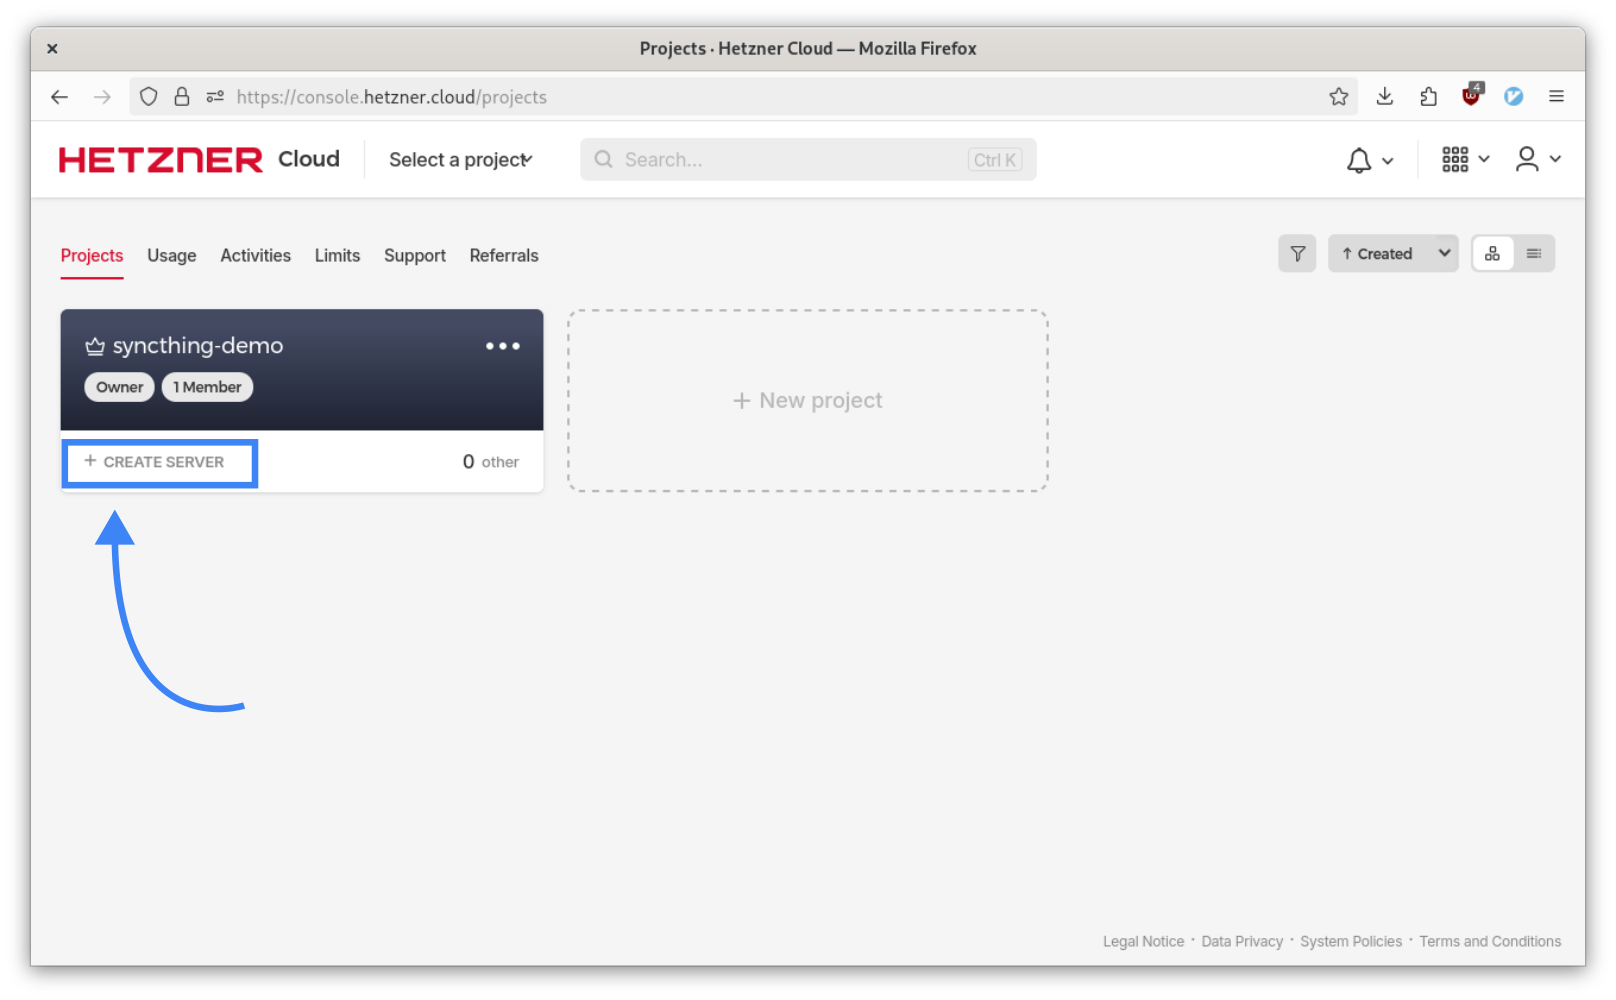
This will take you to a page where you can select the location, OS image, server type, etc.
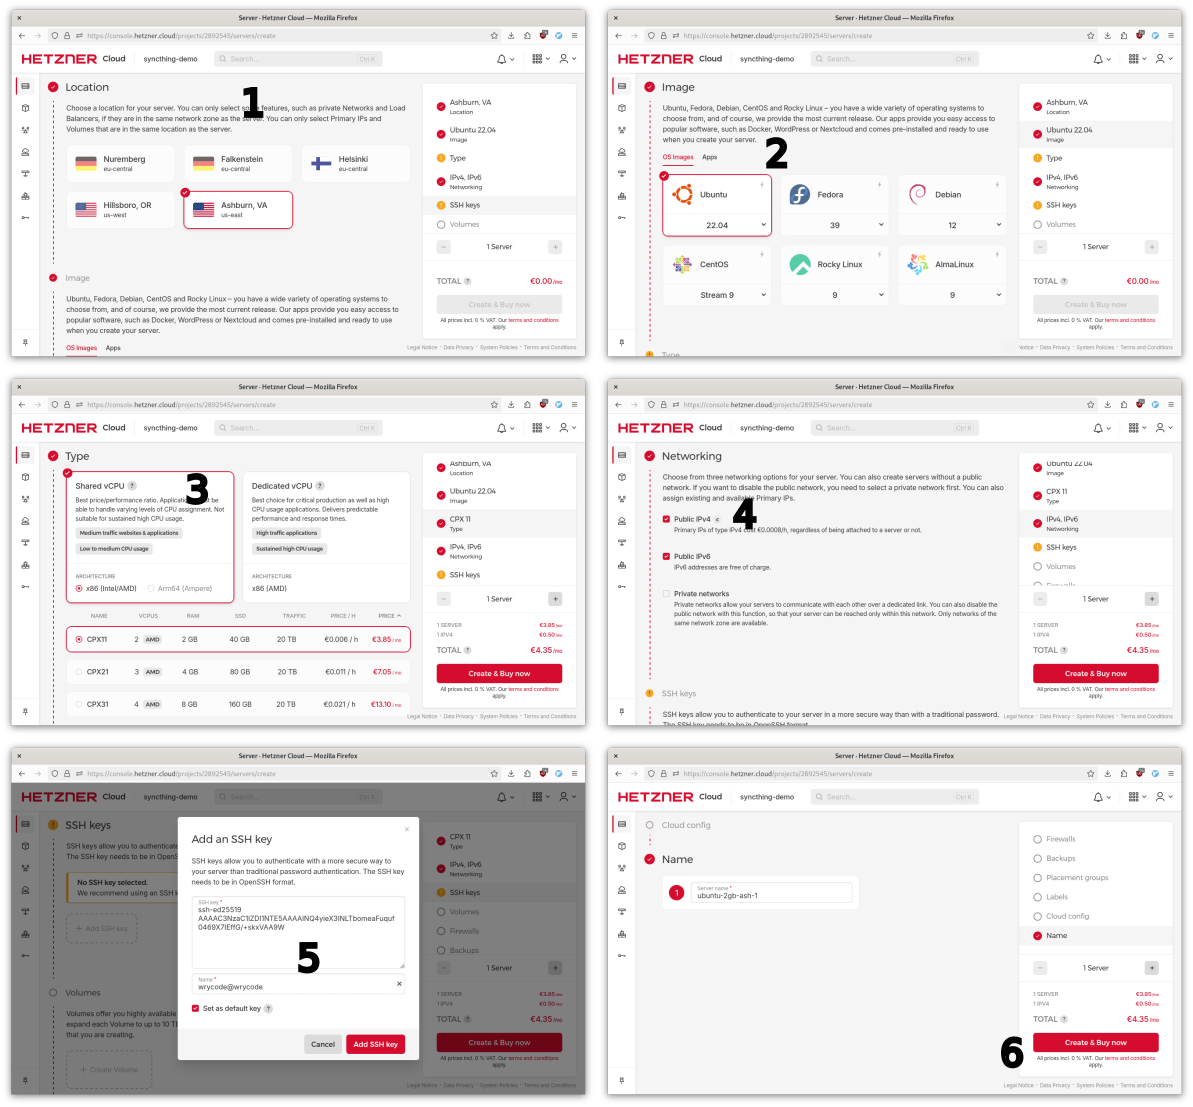
For OS, you can use any Linux distribution. Choose the cheapest server type, and for SSH keys, paste in your pubkey.
Note about IPv6 addresses: You can save €6/year if you remove the IPv4 address. This is actually a great option for Syncthing, which kind of handles its own networking. But IPv6 requires a little extra configuration on NixOS so for simplicity I’ll use IPv4.
The rest of the options (like volumes and firewalls) we’ll ignore for now.
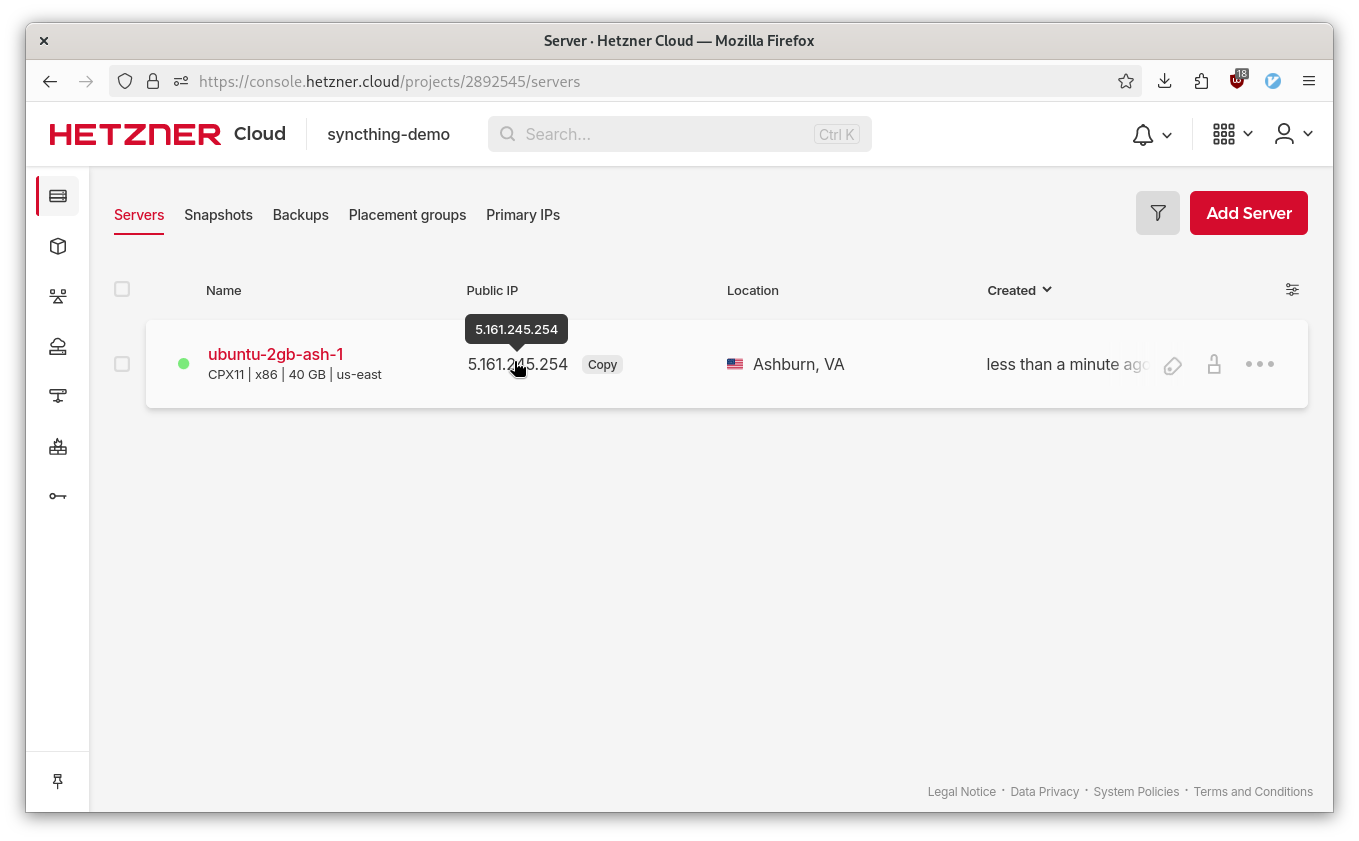
Click “Create & Buy now” and you will be taken to the “Servers” page in our syncthing-demo project where we can watch the server spin up (should be super fast).
Click on the public IP address to copy it. Now let’s add the server to our ~/.ssh/config and make sure we can SSH in.
 Here’s my
 ~/.ssh/config entry:
Host syncthing-demo
     HostName 5.161.245.254
     User root
     IdentityFile ~/.ssh/id_ed25519
Now you should be able to SSH in:
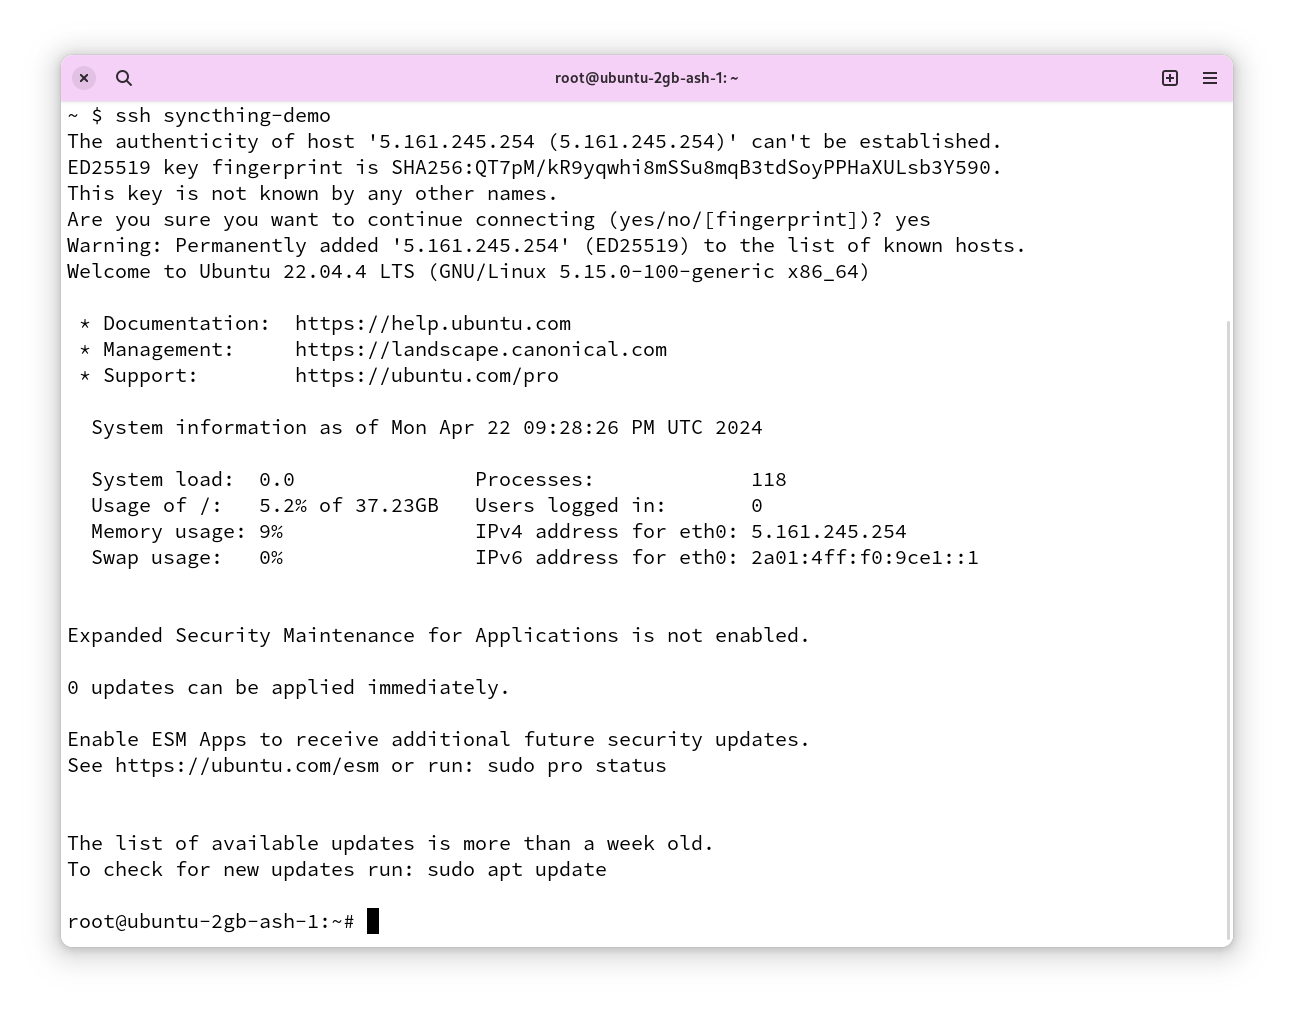
Now it’s time to install NixOS on the server using nixos-anywhere .
I’m not going to explain each step here, because the quickstart guide
already does that. However, these are the files I ended up with:
my nixosConfiguration in flake.nix:
      syncthing-vps = nixpkgs.lib.nixosSystem {
        system = "x86_64-linux";
        modules = [
          disko.nixosModules.disko
          ./syncthing-vps.nix
        ];
      };
syncthing-vps.nix:
(Be sure to add your SSH key, otherwise you won’t be able to log in once NixOS is installed on the server.)
{ modulesPath, config, lib, pkgs, ... }: {
  imports = [
    (modulesPath + "/installer/scan/not-detected.nix")
    (modulesPath + "/profiles/qemu-guest.nix")
    ./syncthing-vps-disk-config.nix
  ];
  boot.loader.grub = {
    # no need to set devices, disko will add all devices that have a EF02 partition to the list already
    # devices = [ ];
    efiSupport = true;
    efiInstallAsRemovable = true;
  };
  services.openssh.enable = true;

  environment.systemPackages = map lib.lowPrio [
    pkgs.curl
    pkgs.gitMinimal
  ];

  users.users.wrycode = {
    isNormalUser = true;
    extraGroups = [ "wheel"]; # Enable ‘sudo’ for the user.
  };

  users.users.root.openssh.authorizedKeys.keys = [
    "< your ssh pubkey here!>"
  ];

  system.stateVersion = "23.11";
}
And finally,
(Copied verbatim from the nixos-anywhere quickstart)
syncthing-vps-disk-config.nix:
# Example to create a bios compatible gpt partition
{ lib, ... }:
{
  disko.devices = {
    disk.disk1 = {
      device = lib.mkDefault "/dev/sda";
      type = "disk";
      content = {
        type = "gpt";
        partitions = {
          boot = {
            name = "boot";
            size = "1M";
            type = "EF02";
          };
          esp = {
            name = "ESP";
            size = "500M";
            type = "EF00";
            content = {
              type = "filesystem";
              format = "vfat";
              mountpoint = "/boot";
            };
          };
          root = {
            name = "root";
            size = "100%";
            content = {
              type = "lvm_pv";
              vg = "pool";
            };
          };
        };
      };
    };
    lvm_vg = {
      pool = {
        type = "lvm_vg";
        lvs = {
          root = {
            size = "100%FREE";
            content = {
              type = "filesystem";
              format = "ext4";
              mountpoint = "/";
              mountOptions = [
                "defaults"
              ];
            };
          };
        };
      };
    };
  };
}
As you can see, we aren’t concerning ourselves with Syncthing yet. We just want a working NixOS system.
Test nixos and disko configuration:
nix run github:nix-community/nixos-anywhere -- --flake .#syncthing-vps --vm-test
Now, to actually install NixOS:
nix run github:nix-community/nixos-anywhere -- --flake .#syncthing-vps syncthing-demo -i /home/wrycode/.ssh/id_ed25519 -L
After removing the old entries from ~/.ssh/known_hosts, you should be able to SSH into the server running NixOS:

NixOS successfully installed! Let’s set up secrets management using age and sops-nix .
We need two encryption keys: one master key, which we’ll call ‘primary’, and one for the Syncthing VPS.
Everything will be encrypted to the primary key, which is on our workstation. This allows us to decrypt secrets so we can edit them, even when the VPS is the consumer. We can generate the primary key using age:
age-keygen -o ~/.config/sops/age/keys.txt
output
$ age-keygen -o ~/.config/sops/age/keys.txt
Public key: age1w3xxadvmxgxa52awwlks04hkguznngel7vfyvwyy8f43watpnytq0mhvj7
We’ll use this public key as the ‘primary’ key.
NOTE: If you want to store the age keys elsewhere, you can set the environment variable SOPS_AGE_KEY_FILE.
For the VPS encryption key, we’ll use the public SSH key of the NixOS server, which already exists. The program ssh-to-age allows us to derive a valid age public key:
nix-shell -p ssh-to-age --run 'ssh-keyscan <server-ip> | ssh-to-age'
output
$ nix-shell -p ssh-to-age --run 'ssh-keyscan 5.161.245.254 | ssh-to-age'
# 5.161.245.254:22 SSH-2.0-OpenSSH_9.6
# 5.161.245.254:22 SSH-2.0-OpenSSH_9.6
# 5.161.245.254:22 SSH-2.0-OpenSSH_9.6
# 5.161.245.254:22 SSH-2.0-OpenSSH_9.6
# 5.161.245.254:22 SSH-2.0-OpenSSH_9.6
skipped key: got ssh-rsa key type, but only ed25519 keys are supported
age1hy9maklmn0d8ek7lx9rjvzx7qt5gngyxwx7nvqklprufy2hy55fqgdenrc
That key at the bottom is the public key we can use to encrypt secrets for the server. There’s no need to get the private key and put it in keys.txt; it exists on the server in /etc/ssh/ssh_host_ed25519_key.
Finally, put your two pubkeys into a .sops.yaml (in the root of the flake):
keys:
  - &primary age1w3xxadvmxgxa52awwlks04hkguznngel7vfyvwyy8f43watpnytq0mhvj7
  - &syncthing-vps age1hy9maklmn0d8ek7lx9rjvzx7qt5gngyxwx7nvqklprufy2hy55fqgdenrc
creation_rules:
  - path_regex: .syncthing-vps-secrets.yaml
    key_groups:
      - age:
        - *primary
        - *syncthing-vps
Since we only need two secrets, I’m storing them in a single file. You can deploy many secrets by making path_regex expand a subdirectory, and you can add creation rules for different deployments.
Now let’s add some secrets to that file we specified: .syncthing-vps-secrets.yaml.
First we need to create a new key.pem and cert.pem for the Syncthing node that will be on the VPS:
cd ~/.keys && nix-shell -p syncthing --run "syncthing -generate=syncthing-vps"
output
$ cd ~/.keys && nix-shell -p syncthing --run "syncthing -generate=syncthing-vps"
2024/04/22 19:54:57 INFO: Generating ECDSA key and certificate for syncthing...
2024/04/22 19:54:57 INFO: Device ID: LOQEF2K-VV5WRBI-BLF76ND-HPB4ZC2-PTIY5VV-KM6WNSV-Q25WD3E-R2YC2AO
2024/04/22 19:54:57 INFO: Default folder created and/or linked to new config
.keys $ ls syncthing-vps/
cert.pem  config.xml  key.pem
.keys $
visudo):
nix-shell -p sops --run "sops .syncthing-vps-secrets.yaml"
We’ll call the secrets syncthing_vps_cert and syncthing_vps_key. Here is what the decrypted text looked like before I saved:
hello: Welcome to SOPS! Edit this file as you please!
example_key: example_value
# Example comment
example_array:
    - example_value1
    - example_value2
example_number: 1234.56789
example_booleans:
    - true
    - false
syncthing_vps_cert: |
  -----BEGIN CERTIFICATE-----
  MIICHDCCAaKgAwIBAgIIE12x+9mqddcwCgYIKoZIzj0EAwIwSjESMBAGA1UEChMJ
  U3luY3RoaW5nMSAwHgYDVQQLExdBdXRvbWF0aWNhbGx5IEdlbmVyYXRlZDESMBAG
  A1UEAxMJc3luY3RoaW5nMB4XDTI0MDQyMjAwMDAwMFoXDTQ0MDQxNzAwMDAwMFow
  SjESMBAGA1UEChMJU3luY3RoaW5nMSAwHgYDVQQLExdBdXRvbWF0aWNhbGx5IEdl
  bmVyYXRlZDESMBAGA1UEAxMJc3luY3RoaW5nMHYwEAYHKoZIzj0CAQYFK4EEACID
  YgAEqRi4ROWUag5+L4MlcycYOaY4haR70m7dY2gWfPO7180cTjs7cG0f8e1+mXRB
  usCtcmAm3GMxxJEzmD+Z04uI1OI3fiYiN2d4wQXxs/iGFQVyMcuRx3kuFTXdyT/e
  hdeFo1UwUzAOBgNVHQ8BAf8EBAMCBaAwHQYDVR0lBBYwFAYIKwYBBQUHAwEGCCsG
  AQUFBwMCMAwGA1UdEwEB/wQCMAAwFAYDVR0RBA0wC4IJc3luY3RoaW5nMAoGCCqG
  SM49BAMCA2gAMGUCMCB96kgif/lboHkFvMTCQTzaGVBWw7TIb7aC8QKrl9VuphPp
  0unVp4qSK+cewwVUjwIxAO1AaPZv21PuuAjBMnR4TZgFBs+9nOQ2vhY/G4wGFwRe
  A0K9uXMV/K/qTN5POlo8Lg==
  -----END CERTIFICATE-----
syncthing_vps_key: |
  -----BEGIN EC PRIVATE KEY-----
  MIGkAgEBBDCGLPiUWRyehkiBFLbyaqhZyxOybUaLDv87eQeq1jullvMU8YAEmqVv
  NTboXSPp+NagBwYFK4EEACKhZANiAASpGLhE5ZRqDn4vgyVzJxg5pjiFpHvSbt1j
  aBZ887vXzRxOOztwbR/x7X6ZdEG6wK1yYCbcYzHEkTOYP5nTi4jU4jd+JiI3Z3jB
  BfGz+IYVBXIxy5HHeS4VNd3JP96F14U=
  -----END EC PRIVATE KEY-----
Save and close the temporary file your editor opened, then take a look at .syncthing-vps-secrets.yaml. You should see recipient fields for both of the public keys we put in .sops.yaml (the one we generated for the workstation, and the one from the server’s SSH host key). Notice that the secret names are not encrypted.
Now we’ve configured sops locally so we can create and edit encrypted files. However, the VPS deployment will not know how to decrypt the secrets without some configuration.
Before we configure sops-nix on the NixOS server, let’s go ahead and deploy Syncthing so we can verify that our deployment is working. Here’s a basic config we can paste into our syncthing-vps.nix:
  services = {
    syncthing = {
      enable = true;
      user = "wrycode";
      configDir = "/home/wrycode/.config/syncthing";   # Folder for Syncthing's settings and keys. Will be overwritten by Nix!
      settings = {
        devices = {
          # Existing devices here!
          workstation.name = "workstation";
          workstation.id = "YWF5JDX-XDVDREO-N6KCQ3N-EZVQY3M-ABNQNOC-HXDL4PH-QGLX2QO-JQY4WQV";

        };
        folders = {
          syncthing-demo = {
            path = "/home/wrycode/syncthing-demo";
            versioning = {
              type = "simple";
              params = {
                keep = "10";
                cleanoutDays = "0";
              };
            };
            devices = ["workstation"];
          };
        };
      };
    };
  };
It’s pretty much the same, but we’ve added our workstation as a node.
This command will deploy the config to the server. We’re done with nixos-anywhere now.
nixos-rebuild switch --target-host syncthing-demo --flake .#syncthing-vps
Presently, you should see a new device pop up in the web UI on your workstation:
We’ll ignore that for now, because we know that the device ID isn’t stable. We need the server to use the secrets in .syncthing-vps-secrets.yaml.
Before configuring sops-nix for the server, you need to add it as a dependency in your flake. I won’t cover this because it’s documented in the sops-nix readme.
To actually configure sops, add the following lines:
  sops.defaultSopsFile = ./.syncthing-vps-secrets.yaml;
  sops.defaultSopsFormat = "yaml";
  sops.age.sshKeyPaths = [ "/etc/ssh/ssh_host_ed25519_key" ];
  sops.secrets.syncthing_vps_key.owner = "wrycode";
  sops.secrets.syncthing_vps_cert.owner = "wrycode";
Deploy the flake using the same nixos-rebuild command. Now, you should be able to see the secrets on the server under /run/secrets:

We can use these secrets directly in syncthing-vps.nix:
  services = {
    syncthing = {
      key = "/run/secrets/syncthing_vps_key";
      cert = "/run/secrets/syncthing_vps_cert";
	  ...
Finally, the only step left is to add the ID for the VPS to your workstation config:
        devices = {
          # Existing devices here!
          syncthing-vps.name = "syncthing-vps";
          syncthing-vps.id = "LOQEF2K-VV5WRBI-BLF76ND-HPB4ZC2-PTIY5VV-KM6WNSV-Q25WD3E-R2YC2AO";
        };
        folders = {
          syncthing-demo = {
            path = "/home/wrycode/syncthing-demo";
            versioning = {
              type = "simple";
              params = {
                keep = "10";
                cleanoutDays = "0";
              };
            };
            devices = ["syncthing-vps"];
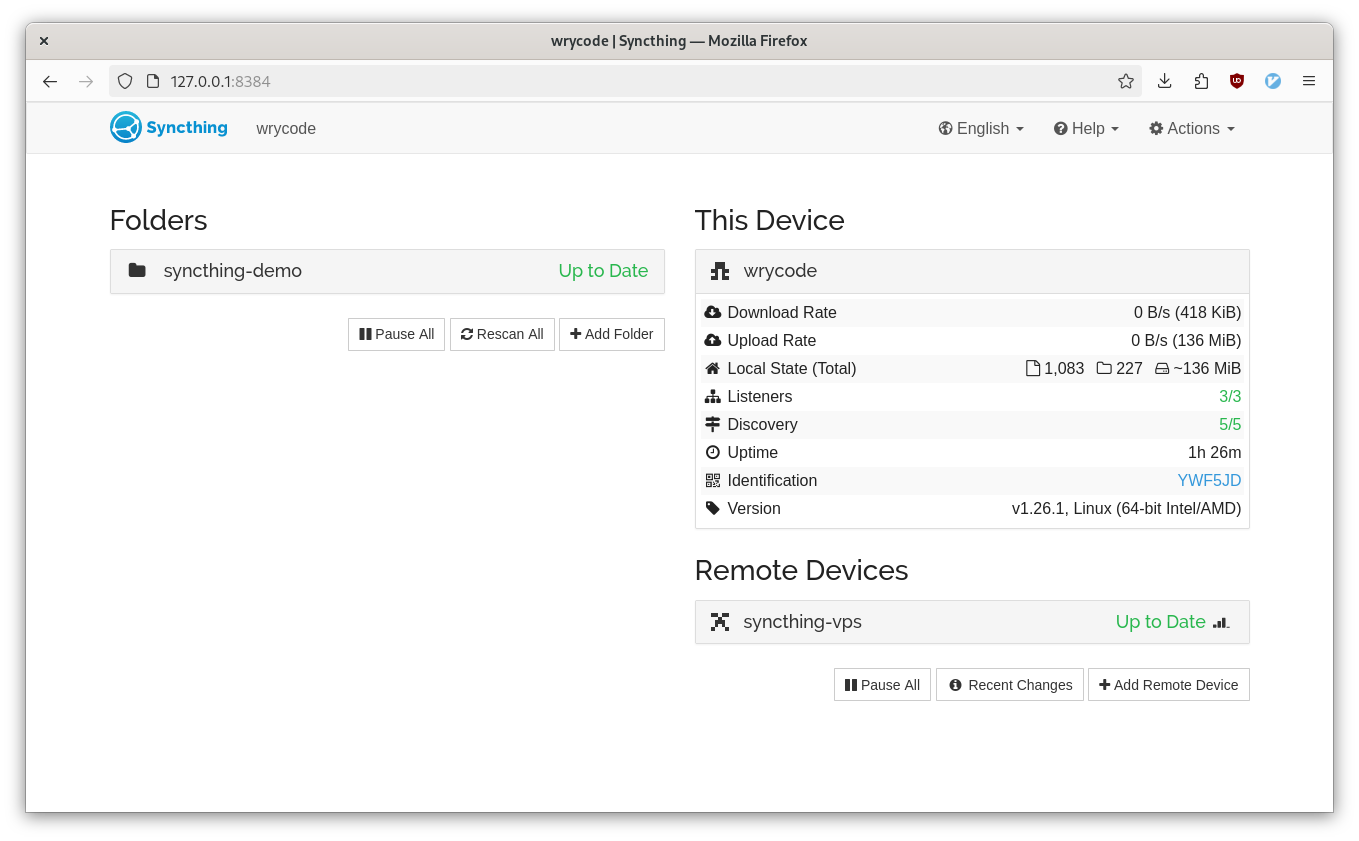
Now your workstation syncthing should show the vps:
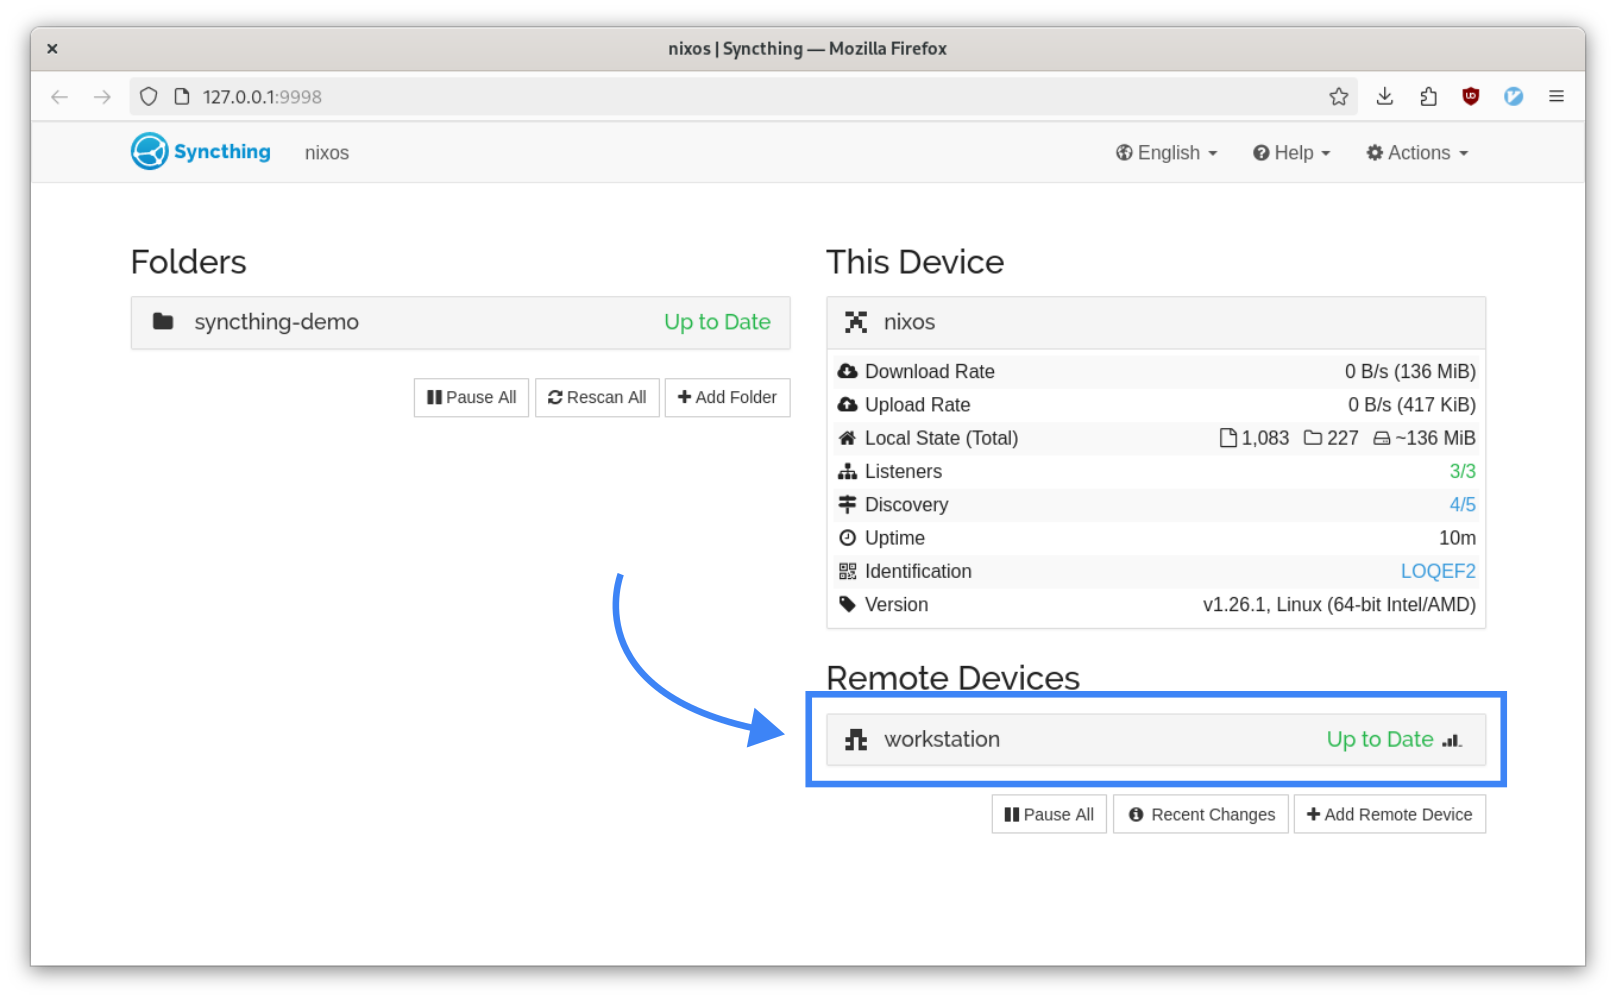
As a sanity check, you can forward the web UI from the VPS and open it on your workstation:
ssh -L 9998:localhost:8384 syncthing-demo
Then open up 127.0.0.1:9998 and you should see your workstation:
What next?
Congratulations, you have a reproducible, multi-node Syncthing configuration! You should take some time to configure your Syncthing folders and devices.
Some other things to consider:
- We only added secrets management for the VPS here. As an exercise, you can add another creation rule to
.sops.yamlfor your workstation and put the Syncthing keys in another file.- If you do this, feel free to get rid of
~/.keys
- If you do this, feel free to get rid of
- Block storage: If you are synchronizing a large media folder, it might be worth looking into Hetzner’s block storage
- IPv6: It is possible to use NixOS-anywhere on IPv6-only targets